Hello! Michelle here with you on this last day of April to share a new layout featuring one of the recent releases from The Cut Shoppe! Since its appearance in the store, I have been eyeing the beautiful floral garlands from the Spring Fling cut file and they instantly came to mind when I was considering how to scrap a super sweet picture of my youngest daughter and her daddy.
When I see a circular shape, like the garlands, I immediately think of "framing." This could mean framing a title or in my case, framing the picture.
By using the garland to frame this sweet picture, I am bringing the attention straight to where I want it.
Using a circular shape is also an invitation to layer--pairing together the diecut floral garland with pretty papers is always a favorite technique.
Looking forward to seeing how you all use this fun and springy cut file!
Hello TCS friends! It's Candace here today and I am so happy to share with you a layout using the "What Goes Around" cut file!
I love the fun intricate circles in this cut file! I started with a piece of white card stock as my background and cut the cut file out of the same white paper. Next, I backed various circles with paper from Elle's Studio Little Moments collection along with some adorable coordinating embellishments. The large cork title is from a recent Studio Calico kit and I love the impact it gives the layout. Here is a look at the final layout.
I just adore this light spring layout and the moment that I captured on the beach! Try using a large title on your next layout to add a little impact. Have a beautiful day!
Hey, friends! Missy back with you, and I have a fun layout to share today. I used the A Way With Words and Quirky Quads Cut Files. I love all of Ashley's background cut files, and you can't ever go wrong with scripty words!
I decided to use the Quirky Quads as a background design element but on a smaller scale. I traced only four of the squares and then copied it four times. I used four patterned papers from the Amy Tan Better Together collection and staggered them on my white cardstock. I used a bit of my Shimmerz watercolors to create a bit of mixed media messyness on the background. I love how the paint peeks through the cut files!
All of my embellishments are also from the same Amy Tan line, and I combined a few different alphas from my stash to complete my title.
I just love these squares! So much fun. I love that you can shrink or enlarge them to customize the look you're going for. I cut "sweet" twice -- one is a little thicker than the other, so I layered them up to create a shadow effect. The pink "sweet" is from a Dear Lizzy Happy Place paper.
I fussy cut all these flowers and leaves from a patterned paper, and I created my own "brad" from this metal paper clip. I used my Tim Holtz scissors to snip off the clip part and just glued it down with a little thread under it.
Here's a look at the top part of the page...more awesome squares and pretty watercolor.
I decided to go with this title since the photo is of my daughter with her two missing front teeth...haha! She looked so adorable...and this title seemed like the perfect one! I made another "brad" here and layered it up with a flower and more thread.
Here's my process video if you'd like to see how this layout came together. I hope you enjoy!
Thanks so much for stopping by, and have a wonderful day!
I first added some splatters
of black mist to a piece of 12x12 kraft cardstock & then I sketched the cut
file Around & Around all over the page choosing just one circle but in
various sizes. I used that as a template to sew my messy circles by. I added
the cardstock, at an angle, to a piece of patterned paper & sewed that into
place. I added some blue glitter texture paste through a stencil & drew a
few small circles around the page. I punched some different sized circles out
of patterned paper & added those in the centre of the circles again sewing
them down. My photos were backed with a few patterned papers & added down the
right hand side. To finish the page I added the title, cut from the A Way With
Words cut file & a few bits of ephemera.
Thank you for joining us
today & I’ll be back with you soon xoxo
Hello there! I'm excited to be sharing a layout with you today using the new Open Letter Alpha cut file!
While there are many ways to use this cut file, I chose to use it as a large part of my title.
I welded the word "Teddy", then cut it out and backed it with patterned paper. I anchored it on the middle of the page, and built my layout around it by adding my photo and the rest of my title. If the focal point of your layout is something other than a picture, I find it's easiest to start with that, and then add the photos and other elements. This provides flexibility to resize/print photos if needed!
I used mist to paint the "XOXO" wood veneer black so it coordinated with the page.
I have plans on using this cut file for a title that takes up the whole page, and to also use the letters on a smaller scale. There are so many possibilities! Thank you for joining me, have a great day!
Recently I am trying to make more projects of all sort, so I have managed to make a 3d box using the cut shoppe files and my big helper silhouette cameo.
It was very challenging as I haven't done this type of project before, I struggled to try to find a way to make the clouds to stay in the place, oh well, joy of creating!
I am excited to introduce you to our second Guest Designer for the month of April, Raquel Bowman! Raquel creates stunning layouts, that always catch my eye! She is one of my fellow designers on the Pink Paislee and Hip Kit Club Design Teams, and I always look forward to seeing her work. She definitely has a beautiful signature style, and I'm happy she's sharing it with us today! Before we take a look at Raquel's layout, let's get to know a little bit more about her.
My name is Raquel and I am an Australian primary school
teacher, Mummy to two kiddies (Jack 1 & Charlotte 3) and wife to
Clint. I admit I am pretty obsessed with scrapbooking and love nothing
more than playing with a variety of yummy papers and embellishments and
making pretty stuff. I love spending time with my family, sharing coffee
with friends, having creative time, a glass of wine at the end of a
tough day and all things social media! I have been scrapping for around
twelve years now and feel I have finally ‘found’ my style. I’m a lover
of layers and clusters and enjoy adding little details while still
maintaining white space, balance and a cleanliness to my layouts.
Here is Raquel's layout, and a little bit about her process for putting it together:
I used the Cuppa Joe set which anyone who knows me
knows I love my coffee so it was a great chance to scrapbook about it
again. I used the bright and fun Amy Tan Better Together collection to
compliment the cut file. I enlarged the heart slightly so I could frame
my photo within it, I was really happy with how it turned out.
What a fun way to use the Cuppa Joe cut file! And how cute is the photo placed in the heart shape on the coffee mug??!! Love your creativity Raquel! Thanks so much for sharing with us today. You can find more of Raquel's work and follow her on Social Media by visiting the following links:
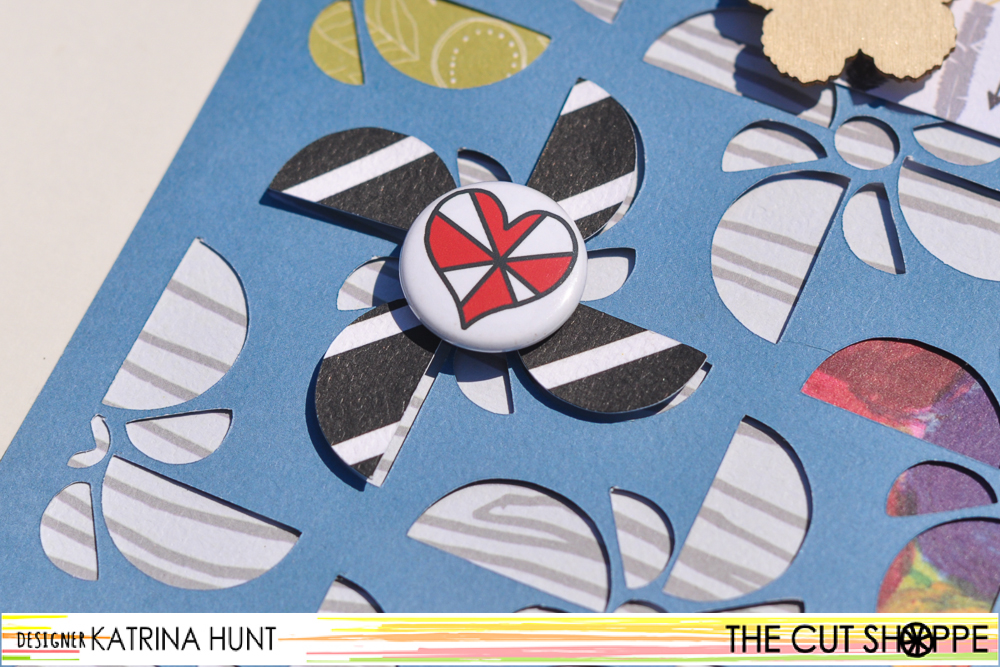
Have you played with the Spinwheels cut file yet? You need to grab it for your collection. It's so versatile and there are so many things you can do with it!
Katrina here from Paper Scissors and Glue today to share a layout made with the Spinwheels cut file. When I started this, this wasn't what I had in mind! But I am not sure why that surprises me anymore, because it's been happening a lot!
I started just by figuring out which paper I wanted to back the cut file with. After that I started picking out different colors/patterns for some of the areas. I used the Fancy Pants Designs Atwell collection, which has a bold color scheme. On some of the ones that I didn't back, I added a couple of sequins in the centers.
I took the left over parts of my cut and flipped them to the other side and used them on a few places. I used foam adhesive to pop them up off the page and give some dimension.
Then I finished off with a little journaling on my Silhouette. I typed my journaling up and then put a digital pattern behind it, so that the journaling would be highlight a little. Placed it on a Maya Road kraft corrugated tag and called it good!
Thanks for stopping by the blog today! Grab the Spinwheels cut file and some others while you are at it over in the Shoppe!


